How Does Check-In Work at Ronald Reagan Washington National Airport?
Ronald Reagan Washington National Airport (DCA) no longer relies on traditional paper boarding passes. Instead, the airport now uses high-tech tools to speed up your journey. For example, officials have fully rolled out biometric eGates and now strictly enforce REAL ID requirements. Thanks to recent upgrades, you can now streamline your DCA Airport check-in using CLEAR’s automated biometric e-gates or Terminal 2’s digital kiosks. To bypass long lines, it is essential to understand these “New DCA” tools.
This guide breaks down the digital requirements and shows you how to use the new “smart lanes” to your advantage. Let us look into Ronald Reagan Washington National Airport’s check-in information in detail.
When Is the Right Time to Arrive for DCA Airport Check-In?
To ensure you have enough time to navigate security and reach your gate, you should follow these general industry standards for DCA. So check below for a complete insight.
- Domestic Travel:
For a smooth DCA Airport check-in, domestic travelers should arrive at the terminal at least two hours before departure. This extra time ensures you can easily handle luggage drop-off, navigate traffic, and clear security during the airport’s busiest rush hours.
- International Travel:
For international departures, you must arrive three hours early. This extra time is vital for mandatory document and passport verification at the ticket counter and for navigating heightened international security protocols.
Furthermore, even if you have already checked in online, these windows allow for unexpected delays in baggage drop-off and security screening, which can fluctuate significantly during morning and late-afternoon “rush hours”.
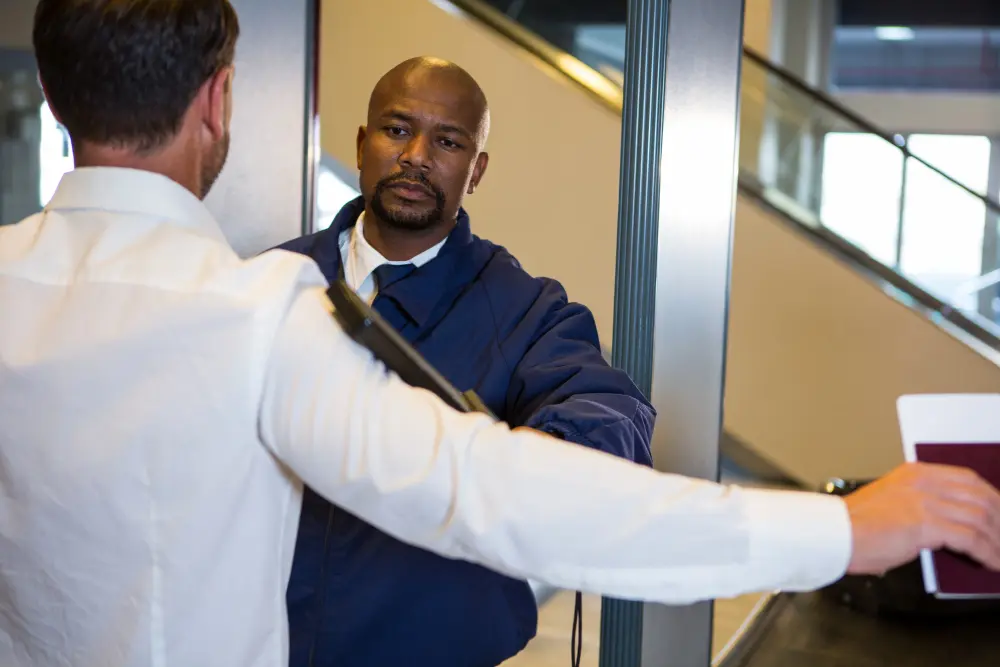
Where Can You Find Security Checkpoints at DCA Airport?
Take a look at the security checkpoint information at DCA Airport to ensure a hassle-free trip.
Terminal 1 (Gates A1- A9):
If you are flying out of the historic Terminal 1 at DCA Airport, you will use a dedicated security checkpoint located directly within that terminal.
- Airlines Served: Air Canada, Southwest, and Frontier
- Location: This checkpoint exclusively serves the “A” gates.
Terminal 2 (Gates B10- E59):
Because Terminal 2 is so large, it utilizes two main security hubs to keep lines moving efficiently. The best part is that once you are airside, you can move between every gate from B10 all the way to E59; therefore, you won’t have to worry about going through security a second time if you want to explore different concourses.
- North Security Checkpoint: Conveniently located closest to American Airlines check-in counters.
- South Security Checkpoint: Positioned near Alaska, Delta, JetBlue, and United. This checkpoint also provides easy access for American Airlines passengers.
DCA Security Checkpoints: Hours of Operation:
Checkpoint schedules vary by location; furthermore, these hours are specifically tailored to provide coverage for the full range of daily flight operations.
| Checkpoint | Opening Time | Closing Time |
| Terminal 1 | 4:00 AM | 9:00 PM |
| Terminal 2 (North) | 4:00 AM | 11:00 PM |
| Terminal 2 (South) | 4:00 AM | 9:00 PM |
What Check-In Options Are Available at DCA Airport?
As a central multi-airline hub, DCA Airport relies on individual airlines to provide and manage their own check-in procedures within the airport’s infrastructure.
Online and Mobile Check-In:
When you check in at DCA Airport using a mobile app or website, you save valuable time. Most airlines open this window 24 hours before takeoff.
Securing a mobile boarding pass empowers travelers with carry-ons to skip traditional ticket lines. This direct path to the security checkpoint offers a much more efficient and seamless experience during the airport’s busiest periods.
Self-Service Kiosks:
You can find self-service kiosks conveniently located on the ticketing levels of both Terminal 1 and Terminal 2. These machines allow you to print your boarding pass and luggage tags quickly.
If you are flying out of Terminal 2, head to the Upper Level (Level 3), where you will find nearly 100 ticket counters and many kiosks designed to help large crowds move through the airport more efficiently.
Full-Service Ticket Counters:
You can also use traditional check-in desks where airline staff help you in person. In Terminal 1, you will find counters for Air Canada, Frontier, and Southwest. Terminal 2 serves Alaska, American, Delta, JetBlue, and United.
These desks are necessary if you have a complex trip, need special assistance, or are traveling internationally and require your documents to be verified. It is a reliable way to get expert help before your flight.
Curbside Check-In:
You can use the curbside check-in at DCA Airport, available for airlines like Delta and American on the upper roadway. You can handle your bags and boarding pass right there at the curb. This keeps you away from the crowded indoor lobbies, letting you breeze through the terminal and move directly to your security checkpoint without delay.
Specialized Check-In Programs:
DCA Airport supports expedited identity verification that integrates with the check-in process:
- CLEAR: Available at every DCA Airport checkpoint, CLEAR uses your unique biometrics to verify your identity. Members can use dedicated lanes to confirm their identity via a quick iris or fingerprint scan before being escorted to the front of the line.
- TSA PreCheck Touchless ID: If you have a valid passport and TSA PreCheck, you can opt in for Touchless ID through your airline’s app. This allows you to clear security at DCA Airport using advanced facial comparison technology, eliminating the need for paper or digital boarding passes.
Must-Know Travel Tips for DCA Airport:
Follow these basic travel tips to make getting through DCA Airport as quick and easy as possible.
- Prioritize an Early Check-In:
TSA suggests arriving at least 2 hours before domestic flights and 3 hours for international departures. DCA Airport is a high-volume airport, especially during early morning and late afternoon “business rush” hours.
- Check Live Wait Times:
Download the MyTSA or DC Airports app to track real-time security lines at all DCA checkpoints. This helps you know exactly what to expect at Terminal 1 and Terminal 2 before you start your journey.
- Follow the TSA 3-1-1 Liquids Policy:
You can use 3.4-ounce (100ml) travel-sized containers and pack them into one clear, quart-sized bag to avoid delays at the security bin.
- Declare Exceptions:
While most liquids are restricted, medications and baby formula/breast milk are notable exceptions. You are allowed to carry larger amounts, but you must declare them to a TSA agent at the start of the security line for individual inspection.
- Pack in Layers:
You must pack your belongings in neat layers: shoes, clothing, and electronics. This organized method helps the X-ray machine produce a clear image, reducing the need for a time-consuming manual bag search.
- Prepare Your Electronics:
If you aren’t enrolled in TSA PreCheck®, remove any device larger than a smartphone from your carry-on. Place these items (such as iPads or Kindles) in their own bin so the X-ray can get a clear view of the components.
- Empty Your Pockets:
Instead of dropping loose change, keys, and jewelry into a security bin, tuck them safely into your carry-on bag. This keeps your belongings together and prevents you from forgetting anything.
- Dress for Speed:
Wear shoes that are easy to slip off and avoid belts with significant metal components. Doing so minimizes the chances of triggering an alarm and keeps the security line moving efficiently for everyone.
- Mind the 2026 REAL ID “ConfirmID” Fee:
The REAL ID rules are now strictly enforced. If your driver’s license doesn’t have the star symbol in the top corner, it isn’t compliant. You can bring your passport instead to avoid paying the new TSA “ConfirmID” fee.
As of February 2026, if you don’t have a REAL ID, you might be charged $45. This fee covers an extra identity check you must pass before you are allowed to go to your gate.
Conclusion:
Getting through Ronald Reagan Washington National Airport is easier than ever if you use the airport’s new digital tools. Because REAL ID is now strictly required, arriving early and having the proper documents is key. You can skip the long lines by using mobile check-in, kiosks, or biometric programs like CLEAR and TSA PreCheck. Understanding how the checkpoints and “smart lanes” work will help you breeze through security without the usual travel stress.
FAQs
For domestic flights, arrive at least 2 hours early. For international flights, plan to arrive 3 hours before departure to allow time for document checks and security.
While paper boarding passes are still accepted, DCA strongly encourages digital options, such as mobile boarding passes, kiosks, and biometric check-in, to speed processing.
Terminal 1 has one dedicated checkpoint for Gates A1-A9. Terminal 2 has two checkpoints, North and South, serving Gates B10 through E59.
Yes. CLEAR is available at all DCA checkpoints, and TSA PreCheck Touchless ID is available for eligible passengers who opt in through their airline.
If you don’t have a REAL ID, you can use a passport instead. Otherwise, you may be subject to an extra identity check and a ConfirmID fee.
Yes. Select airlines, including American and Delta, offer curbside check-in on the upper roadway for faster bag drop and check-in.